
Look at the site in 3D
See every hole of a project in place in GeotechOS Borehole Logging, with the ground units as solids between them, the ground and the water table.
Applies toWindows and macOSWeb browser
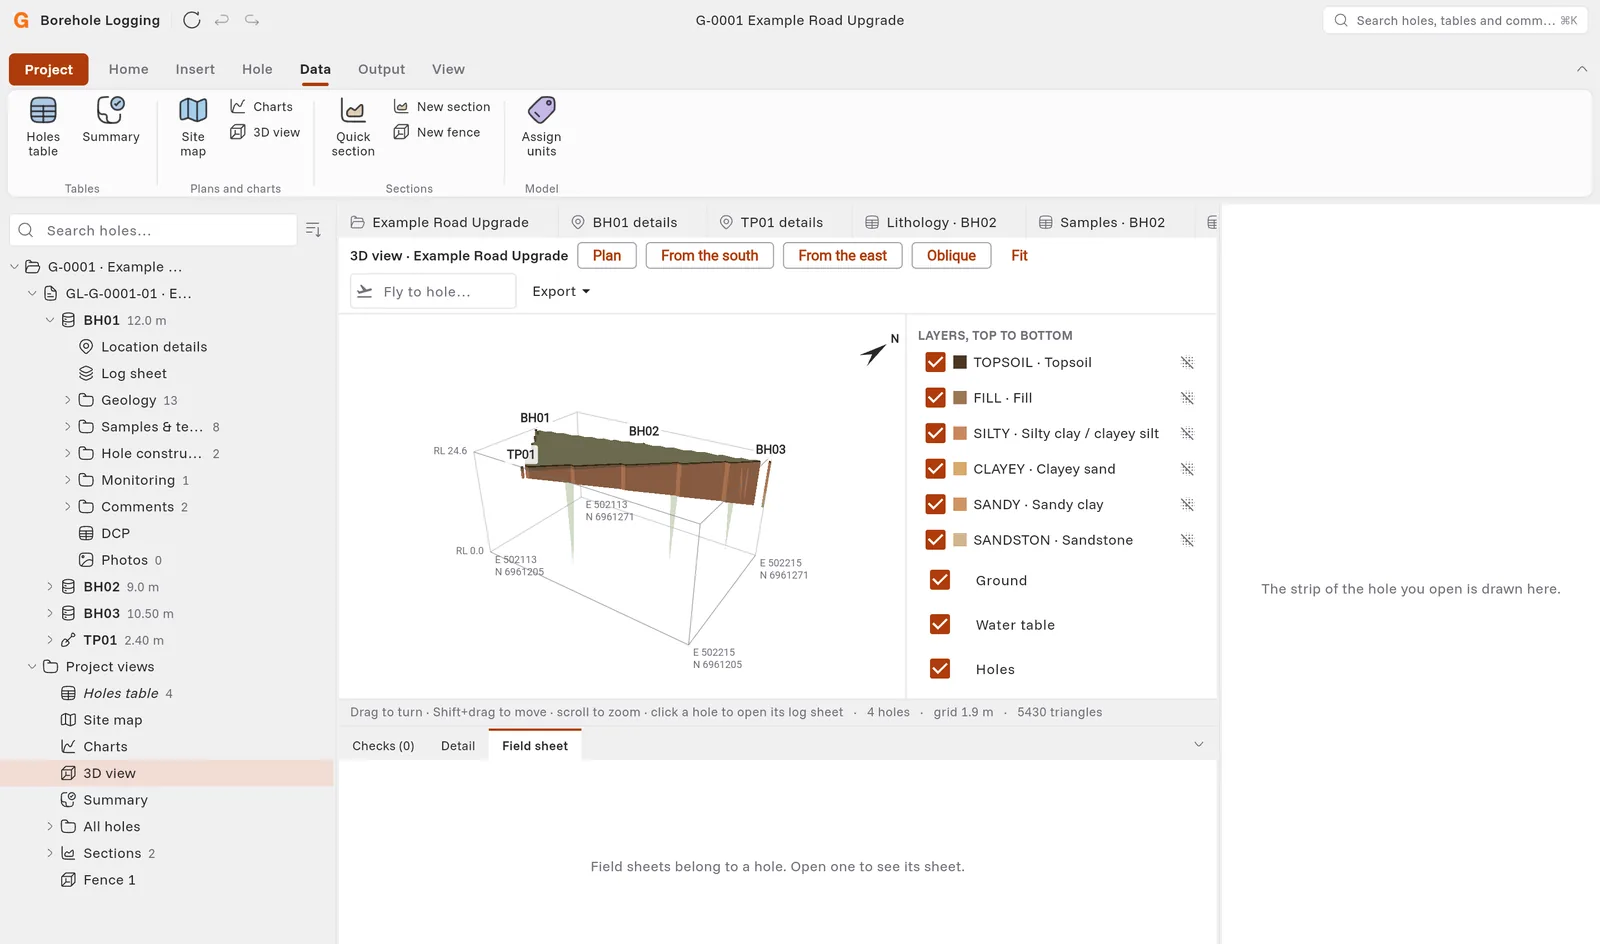
The 3D view shows each hole of the project at its position and level. Borehole Logging draws the ground units between the holes as solids, with the ground surface and the water table. Use it to see how the units change across the site.
Before you start
- The 3D view needs three or more holes with an easting, a northing and a ground level (RL).
- Give the strata a geology unit. Borehole Logging joins the strata of the same unit between the holes. Strata with no unit join on their legend. Click Data › Assign units to give units to many strata at a time.
Open the 3D view
- In the project tree, click the project.
- Click Data › 3D view.
Move around the model
- Drag to turn the model.
- Hold Shift and drag to move the model.
- Scroll to zoom.
- Click Plan, From the south, From the east or Oblique to look from that direction. Click Fit to show all the model.
- In Fly to hole…, type the identifier of a hole, for example BH02, and press Enter.
- Click a hole to open its log sheet.
Show and hide layers
Under Layers, top to bottom, tick or clear a unit to show or hide it. Ground, Water table and Holes are also in the list.
Under Colour by, select Unit, Legend or Symbol. Under Surfaces, select Linear or Smooth, and Coarse, Normal or Fine.
Look inside the model
- Vertical exaggeration: makes the model taller, so thin units are easier to see.
- Explode: lifts the units away from each other.
- Cut above RL: removes the model above a level.
- Slice along a section: shows only the model near a cross-section. Select the section and set the Corridor. Select Whole site to show all the model again.
Add surfaces
Under Imported surfaces, click Import… to add a surface, for example a LandXML ground model. A ground surface becomes the top of the model where it reaches. Click Volumes… to see the volume of each unit, and the cut and fill between two surfaces or between a surface and a level.
Save the view
Click Export, then Image (PNG)… or A3 sheet (PDF)….