
Log a hole on a phone or tablet
Log boreholes and test pits on site with the Borehole Logging field logger: open an investigation, add a hole, and add strata, samples and tests.
Applies toPhone and tabletWeb browser
On a phone or a tablet, GeotechOS Borehole Logging opens the field logger. The field logger is for work at the rig or the test pit. It has large buttons and one form for each row. It works with no signal.
Before you start
- Open Borehole Logging on the phone or tablet and sign in. In the phone's web browser, go to au.geotechos.com/bhlcs. For the phone or tablet app, contact support. See Open Borehole Logging and sign in.
- Make sure that the investigation exists. Somebody makes it in the office first. See Create a project.
- Open Borehole Logging one time while the phone has signal. Borehole Logging then copies all open investigations to the phone.
Note: In a web browser on a computer, Borehole Logging also shows the field logger when the window is narrower than 1100 pixels. Make the window wider to get the desktop workspace.
Find the investigation
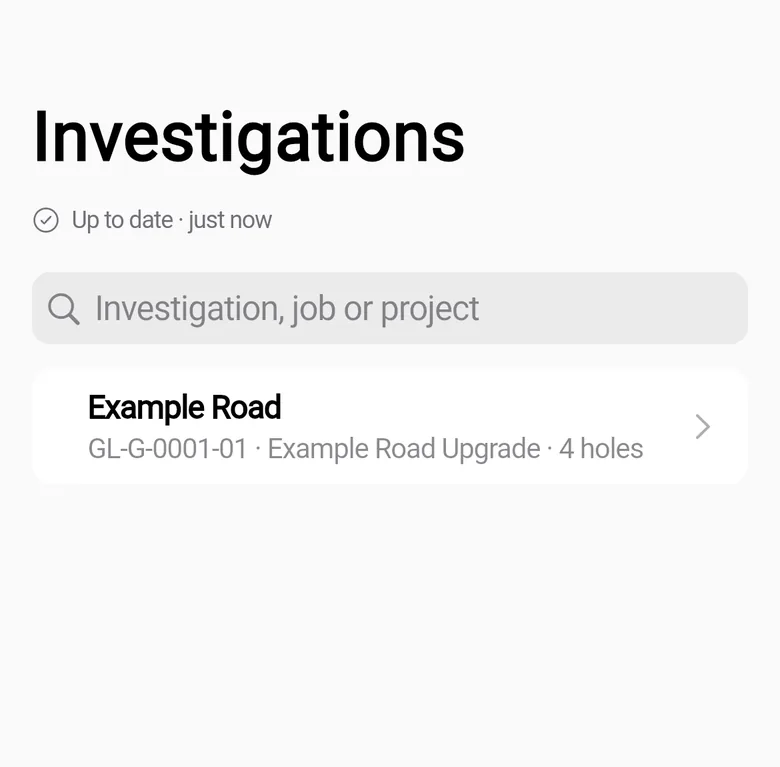
The Investigations screen shows each open investigation that is on the phone. You do not need to download anything before you go to site.
- Tap Investigations at the bottom of the screen.
- Optional: tap My jobs to see only the investigations on your jobs. Tap All open investigations to see all of them. These two buttons show only when you have jobs.
- Optional: in the search box, type part of the investigation number, the job or the project.
- Tap the investigation.
Each row shows the investigation number, the project, the number of holes and the number of changes to send. Final shows when the investigation is finalised. You cannot change a finalised investigation.
Add a hole
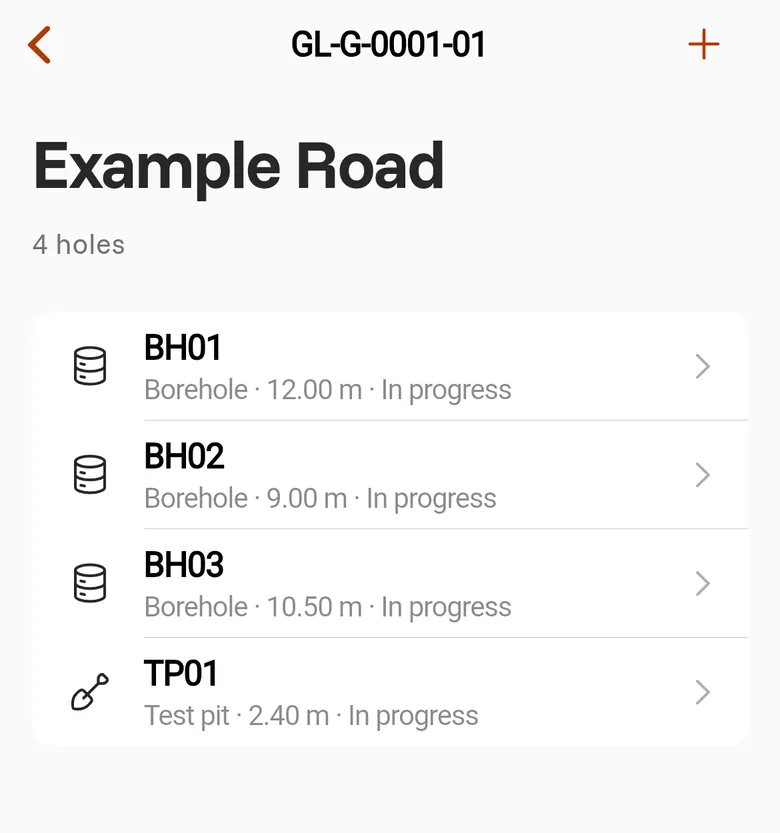
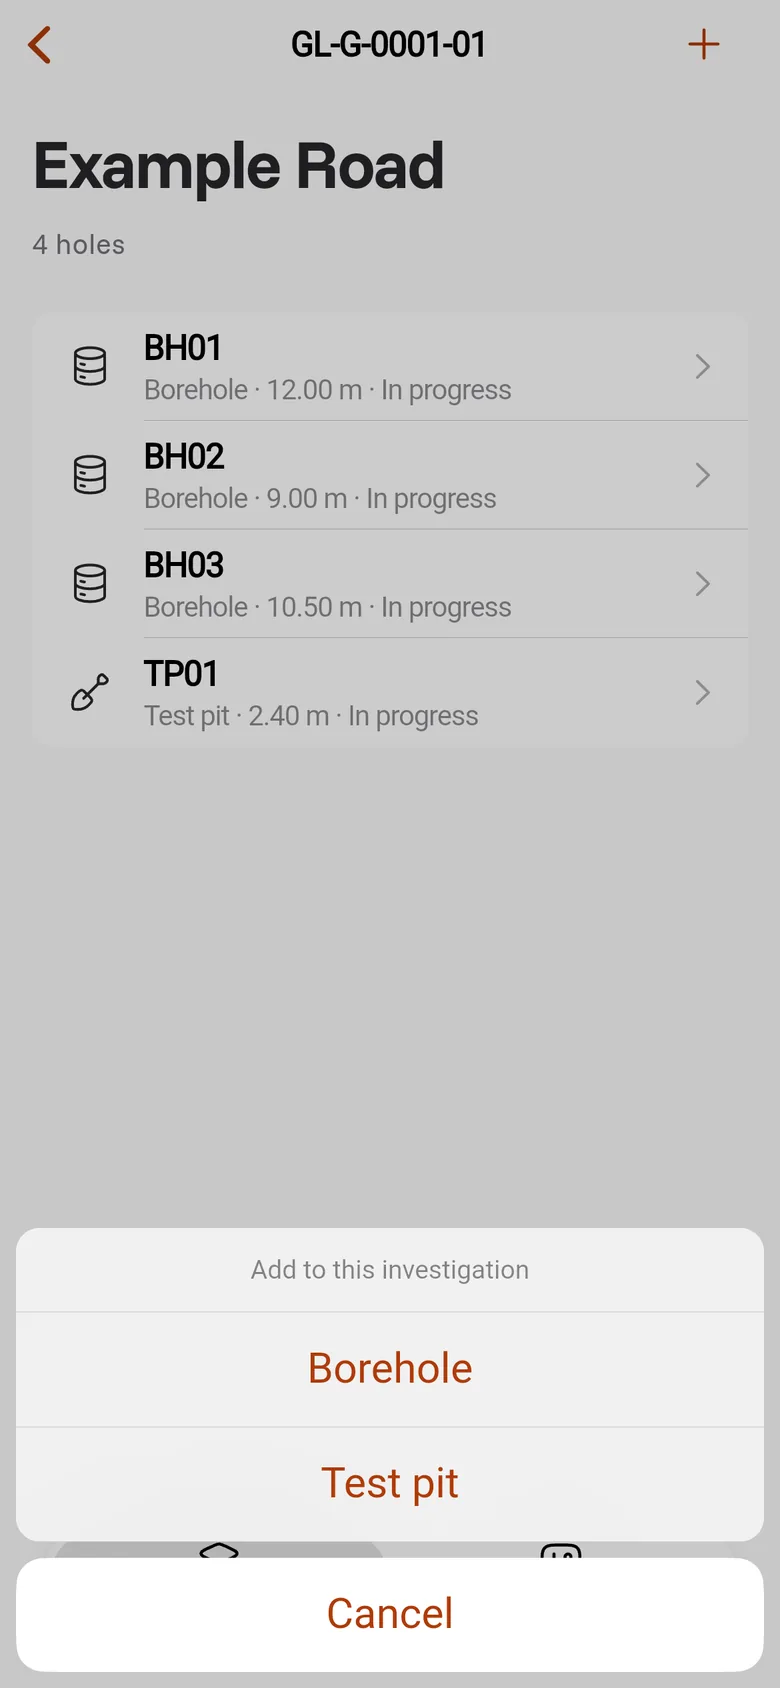
- In the investigation, tap + at the top right.
- Tap Borehole or Test pit.
- In Identifier, type the identifier, for example BH04.
- In Final depth (m), type the final depth. If the hole is not drilled yet, type 0.
- Tap Add.
Borehole Logging adds the hole on the phone with the status In progress and today's date as the start date. The office gets the hole at the next sync.
Open a hole
Tap the hole in the list. Each hole shows its type, final depth and status. A word at the right tells you more:
| Word | What it means |
|---|---|
| Unsent | Changes to this hole are on the phone only. They go to the server at the next sync. |
| A device name, for example Site iPad | Another device holds the hole. You can look at the hole, but you cannot change it. |
| Locked | The hole is locked in the office. You can look at it, but you cannot change it. |
When you open a hole, your phone holds it. Other devices cannot change the hole while you log it. When you go back, Borehole Logging gives the hold back after your changes are sent. See Holds: one device edits a hole at a time.
Move between the tables
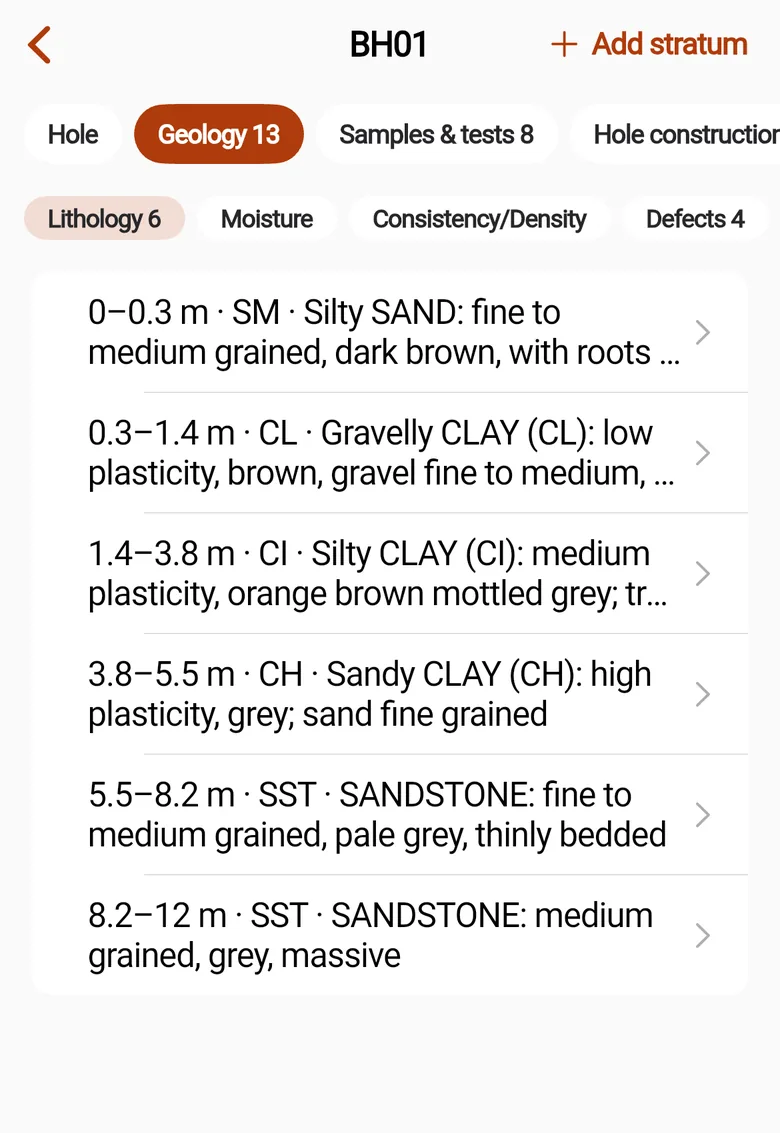
The hole has a row of tabs at the top: Hole, Geology, Samples & tests, Hole construction, Monitoring, Comments, Photos and Strip. Swipe the row to see all the tabs.
Under a tab with more than one table, a second row shows the tables. For example, Geology has Lithology, Moisture, Consistency/Density, Defects, Core runs, Strength, Weathering and Defect spacing. The number on a tab is the number of rows in it.
The tables are the same as on the desktop. For what to type in each table, see Describe the soil and rock, Samples and in-situ tests and Groundwater.
Add a row
- Tap the tab and the table, for example Geology and Lithology.
- Tap the add button at the top right, for example Add stratum. On a narrow phone, a long name shows as Add.
- Fill in the form.
- Tap Save.
Borehole Logging fills in some fields for you. A new stratum starts at the bottom of the last stratum. A new sample takes the next number, for example D2 after D1.
If a value is not correct, Borehole Logging shows a message under the field and does not save the row. Correct the value and tap Save again.
For an SPT, type the blows for each 150 mm: Seating, Test 1 and Test 2. Borehole Logging shows the result, for example N=14, under the blows.
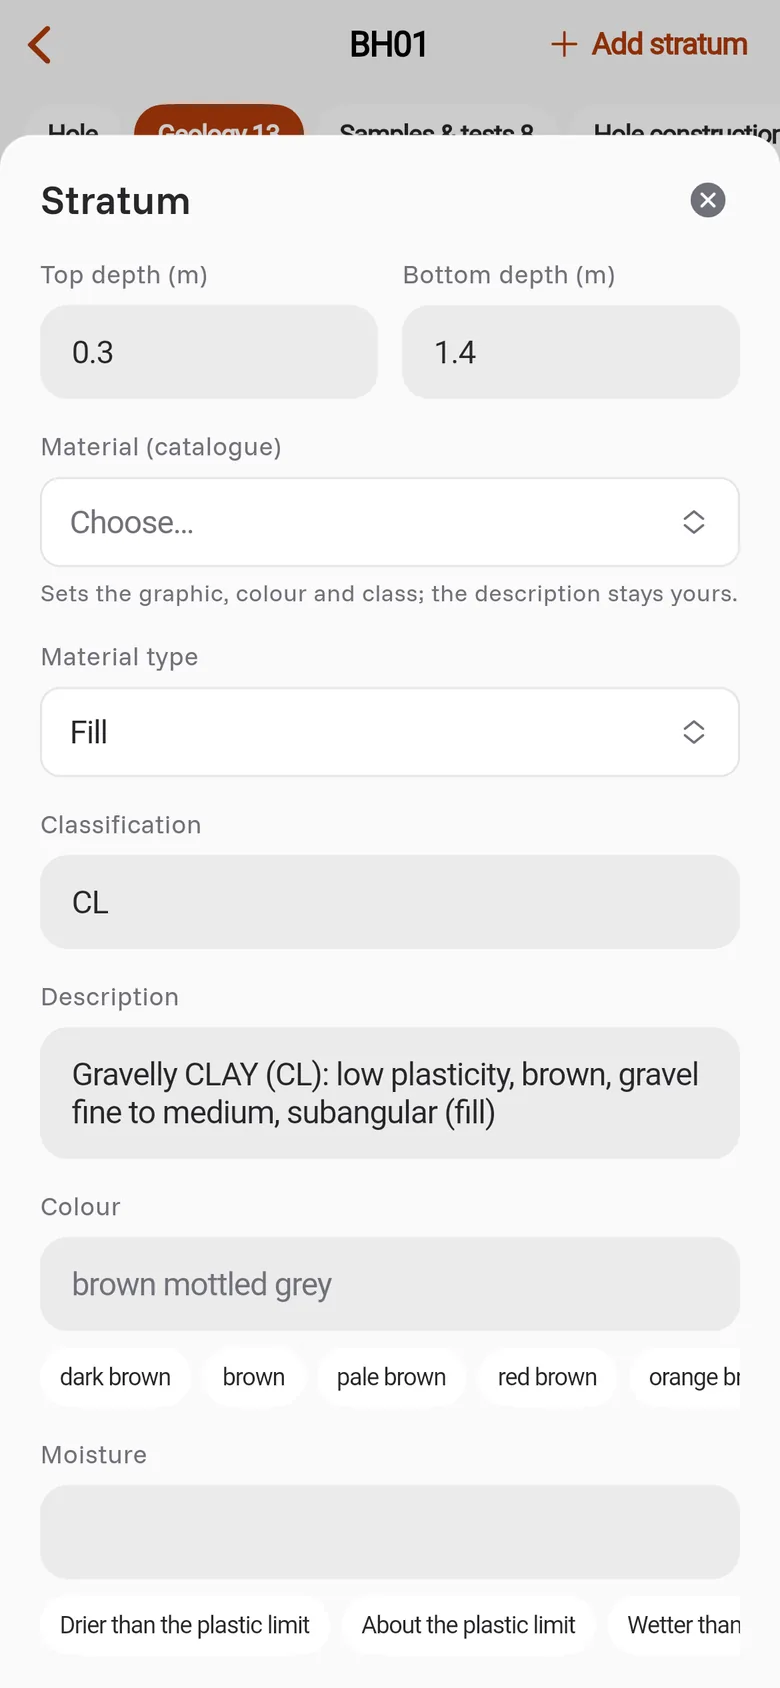
Change or delete a row
- Tap the row.
- To change the row, change the fields and tap Save.
- To delete the row, tap Delete. Then tap Delete again to confirm.
To close the form and keep the row as it was, tap Cancel or the × button.
Fill in the hole details
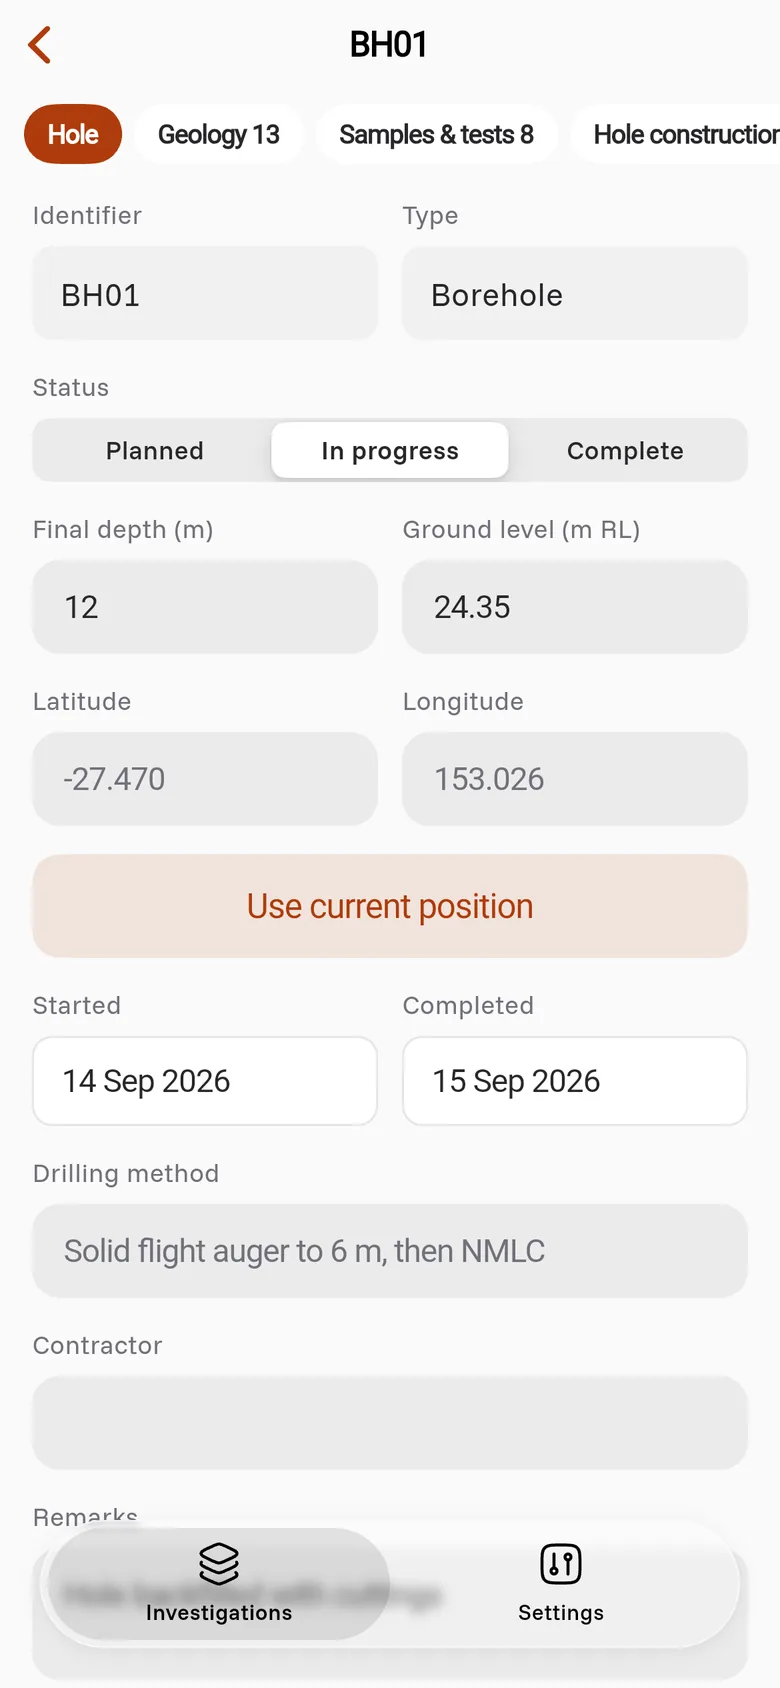
- Tap Hole.
- Change the fields, for example Status, Ground level (m RL) or Contractor.
- To put the phone's position in Latitude and Longitude, tap Use current position.
- Tap Save changes.
For Started and Completed, tap the field and select the date.
Look at the strip
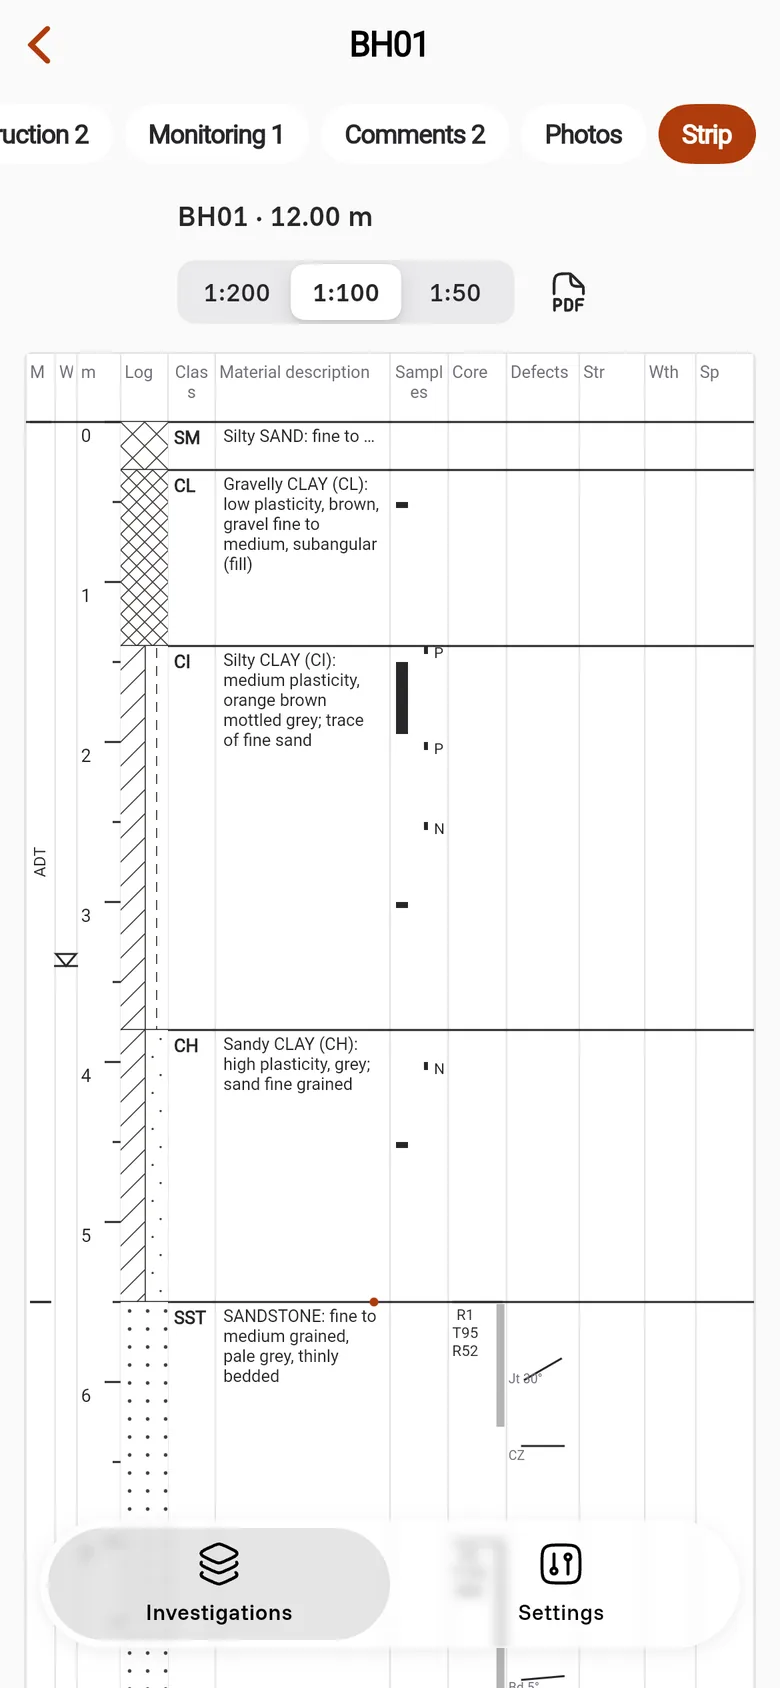
Tap Strip to see the log drawn as a column, with the depth scale at the left.
- Tap 1:200, 1:100 or 1:50 to change the scale.
- Tap a stratum to open its form.
- Tap PDF to open the printed log sheet. Borehole Logging draws the sheet on the phone, so this works with no signal. If the sheet has a layout problem, Borehole Logging tells you what to correct.
On a tablet that is 900 pixels wide or more, the strip stays at the right of the table. You do not need the Strip tab.
Tip: With a keyboard, press Ctrl+N (⌘+N on an iPad) to add a row to the open table.