Draw cross-sections and fence diagrams
Draw cross-sections through holes in GeotechOS Borehole Logging, join the units between holes, print a quick section and stand sections up as a fence.
Applies toWindows and macOSWeb browser
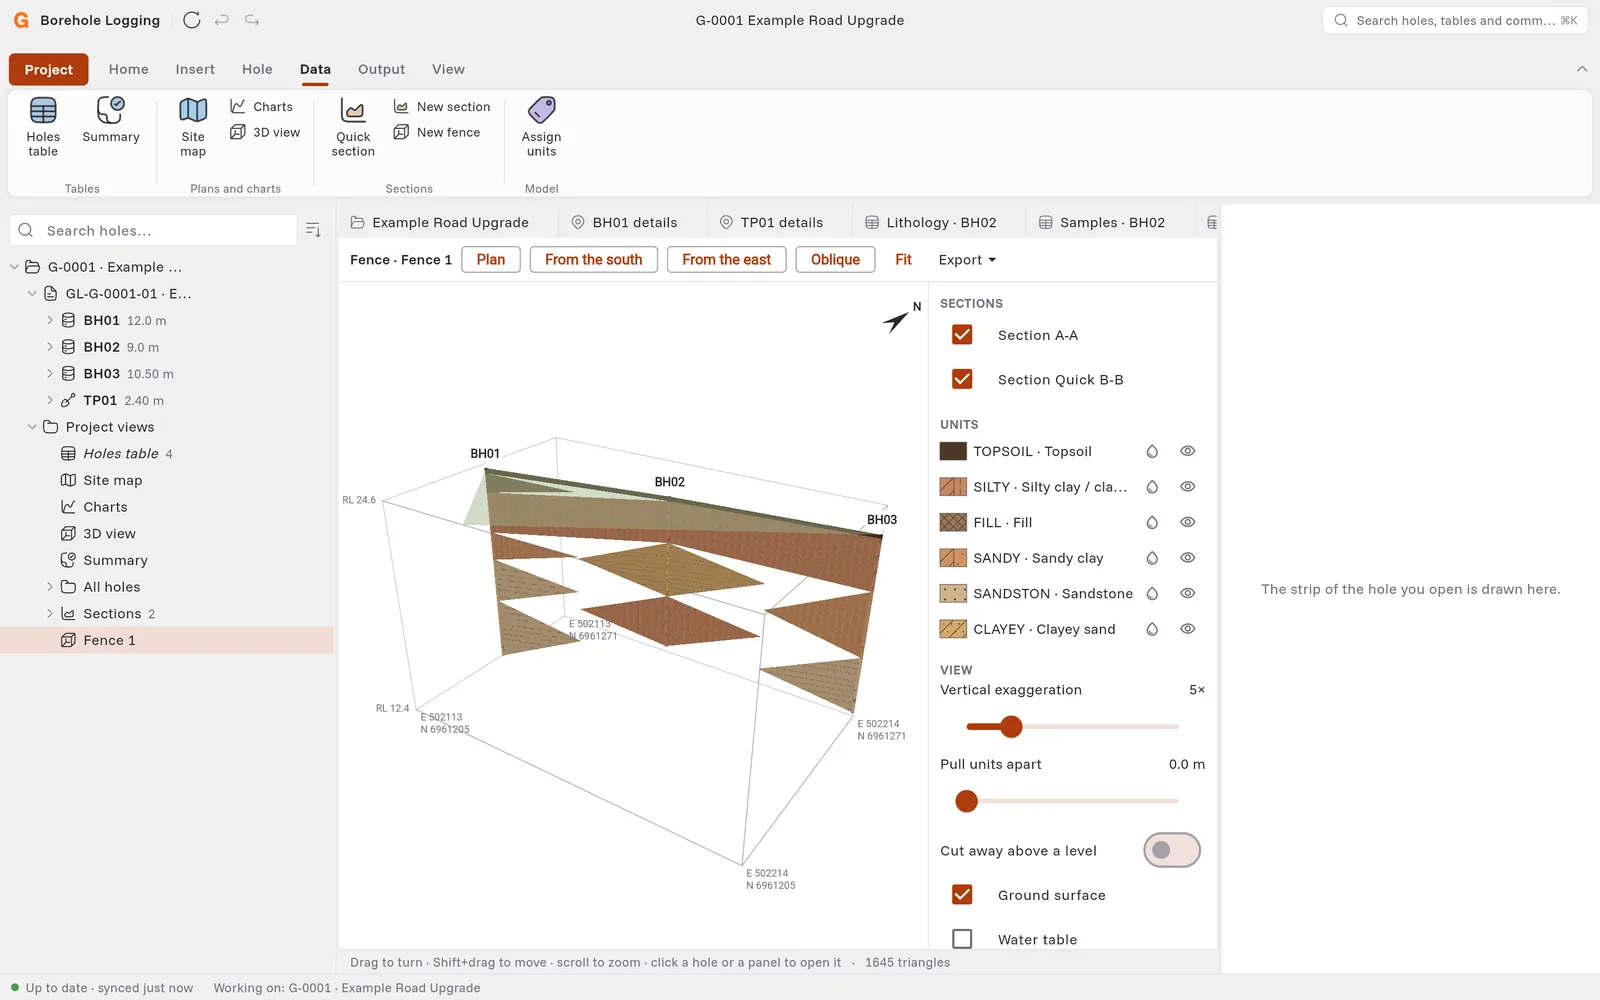
A cross-section shows the holes near a line on the site, at their chainage and level. You draw the ground units between the holes. A quick section is a printable sheet of the holes only. A fence diagram stands the sections of a project up together in 3D.
Before you start
- Give the holes their easting, northing and ground level (RL).
- Optional: give the strata a geology unit. Borehole Logging then joins the strata of the same unit between the holes. Click Data › Assign units to give units to many strata at a time.
Make a cross-section
- In the project tree, click the project.
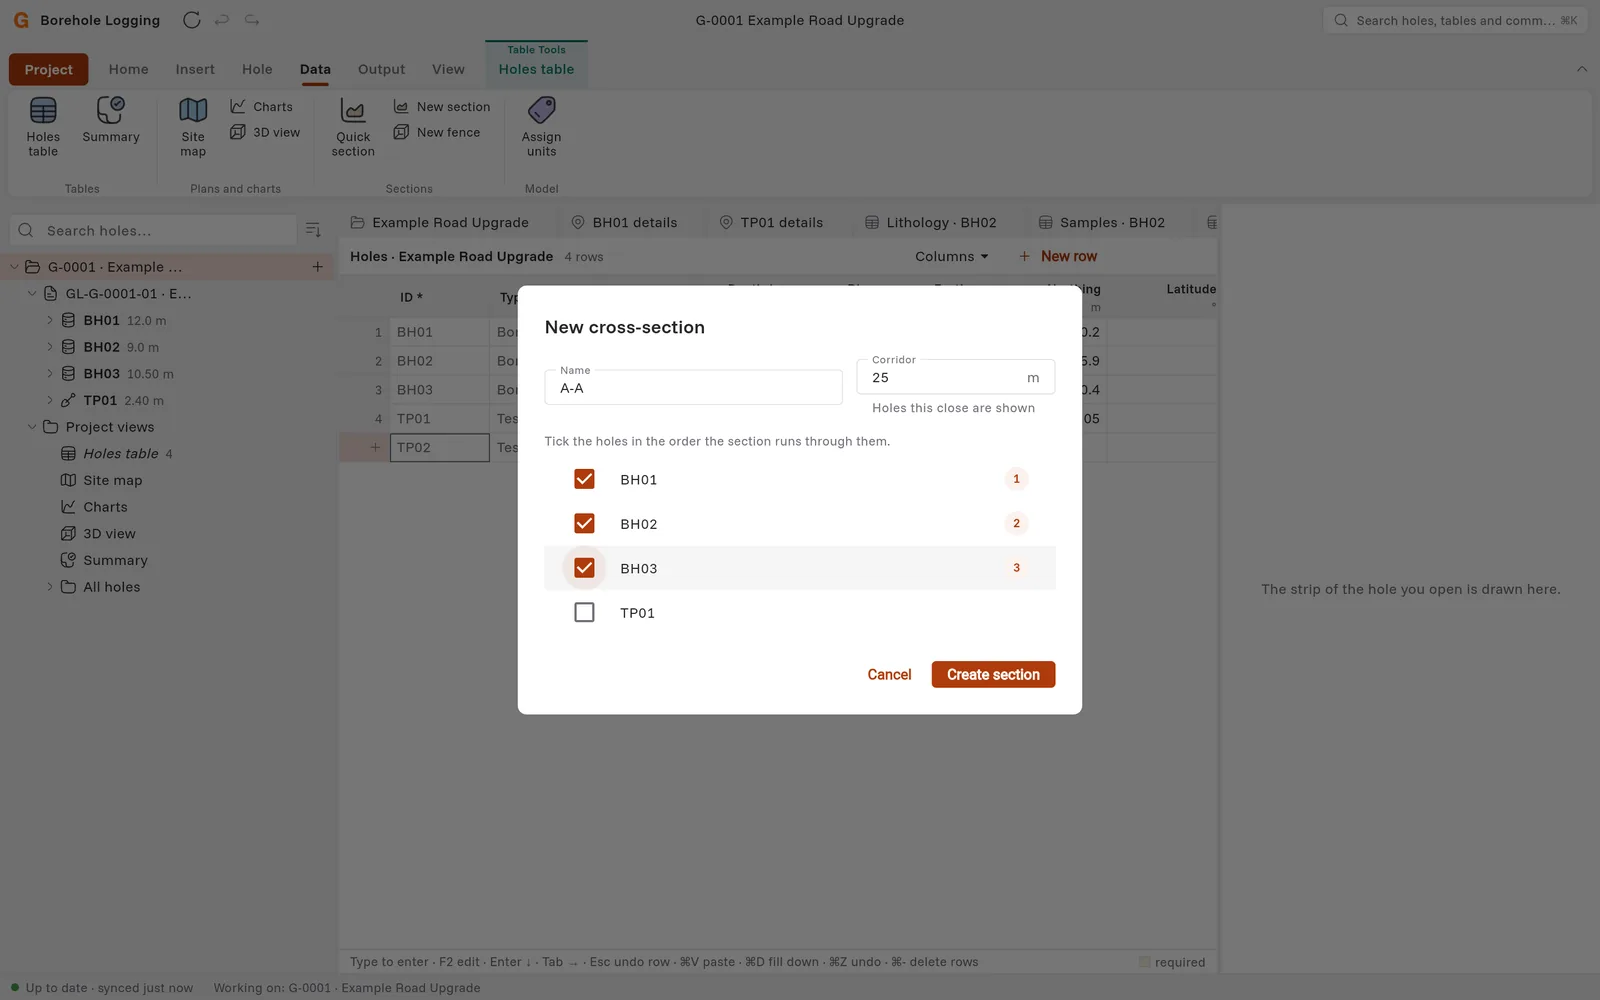
- Click Data › New section.
- In Name, type the name of the section, for example A-A.
- In Corridor, type the distance from the line, in metres. The section shows the holes in this distance.
- Tick the holes in the order that the section goes through them. A number shows the order.
- Click Create section.
The section opens. It also shows under Project views › Sections in the project tree. You can also draw the line of a section on the site map. See Show the holes on a site map.
Draw the units between the holes
Let Borehole Logging join the units
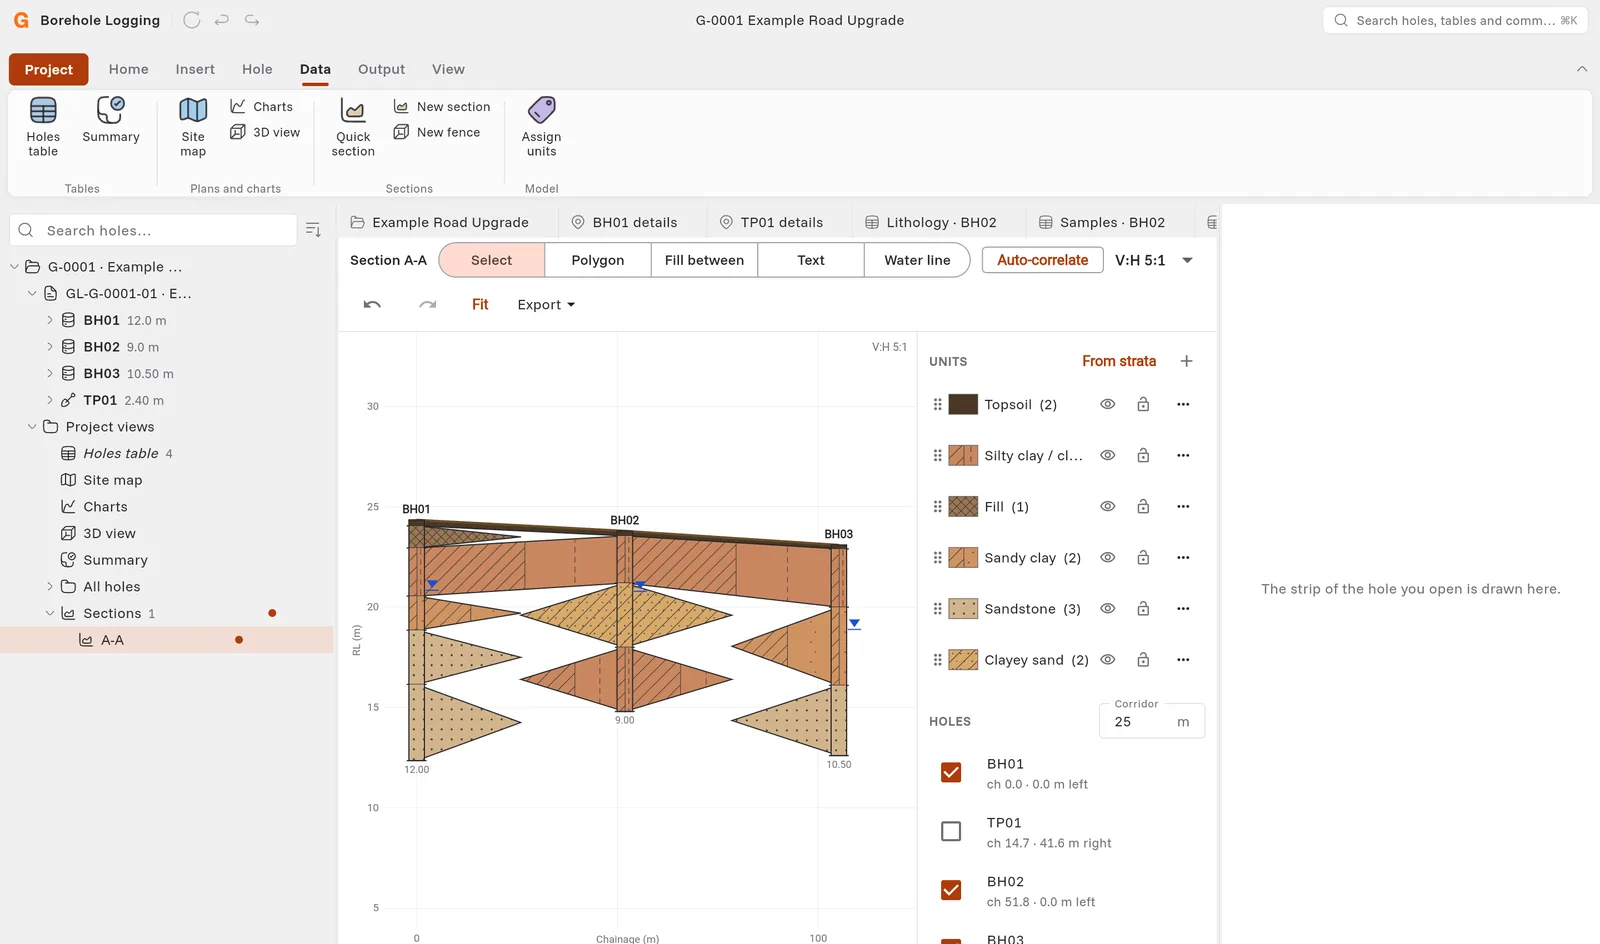
- Click Auto-correlate. Borehole Logging shows the polygons that it suggests with dashed lines.
- Click a dashed polygon to keep it, or click Accept all. To remove the suggestions, click Discard.
Draw the units yourself
Select a tool at the top of the section:
| Tool | How to use it |
|---|---|
| Fill between | Click a stratum on one hole, then the matching stratum on the next hole. Borehole Logging draws the unit between them. Continue along the section. |
| Polygon | Click the corners of the polygon. The corners snap to the strata, the collars and other corners. Click the first corner again, or press Enter, to close it. |
| Select | Click a polygon to select it. Drag a corner to move it. Hold Shift to stop the snap. Double-click an edge to add a corner. Press Delete to delete the polygon. |
| Text | Click where the note goes. Type the note and click OK. |
| Water line | Click along the water table, then press Enter. |
To undo a change, click the undo button or press Ctrl+Z.
Units
The Units list at the right shows each unit with its pattern and colour.
- Click From strata to make a unit for each geology unit and legend in the holes.
- Click + to add a unit.
- Click the eye to hide a unit, and the lock to stop new polygons from going into it.
- Click ⋯ to rename the unit, or to delete it with its polygons.
Holes
Under Holes, tick or clear a hole to show or hide it on the section. Each hole shows its chainage and its distance to the left or right of the line. Change the Corridor to show holes that are farther from the line.
Change the view
- Select the vertical exaggeration, for example V:H 5:1.
- Click Fit to show all of the section.
- Scroll to zoom.
Borehole Logging saves the section on this computer and sends it at the next sync.
Save the section
Click Export, then Image (PNG)…, A3 sheet (PDF)… or CAD drawing (DXF)….
Print a quick section
A quick section is a sheet with the holes along a line, to a scale. It does not have units between the holes.
- Click Data › Quick section.
- Type the Name, then tick the holes in order. Or select a Section line that you have already.
- Click Create quick section.
- Under Sheet settings, set the Paper, the Horizontal scale and the Vertical scale. Click Fit scales to sheet to make the holes fit on the paper.
- Optional: type a Start chainage, a Top elevation / RL and Notes. Tick Grid and Groundwater to show them.
- Click Export PDF.
Make a fence diagram
- Make two or more cross-sections first.
- Click Data › New fence.
- Type the Name, and tick the sections under Sections to stand up.
- Click Create.
Drag to turn the fence. Hold Shift and drag to move it. Scroll to zoom. Click a hole or a panel to open it. Click Plan, From the south, From the east or Oblique to look from that direction.
In the panel at the right, you can:
- Show or hide a unit, or make it see-through.
- Change the Vertical exaggeration.
- Use Pull units apart to lift the units away from each other.
- Turn on Cut away above a level.
- Show the Ground surface and the Water table.