
Use the tables
Enter borehole log records in the Borehole Logging tables. Add rows, move with the keyboard, paste from Excel, fill down, undo, and fix rows the app holds back.
Applies toWindows and macOSWeb browser
You enter most of a log in tables, for example the lithology, the samples and the groundwater. Each table works like a spreadsheet. This page tells you how to use all of them.
Open a table
Do one of these:
- In the project tree, open the hole, then a group, for example Geology. Double-click a table, for example Lithology.
- Press Ctrl+K (⌘+K on a Mac). Type the hole and the table, for example BH02 lith. Press Enter.
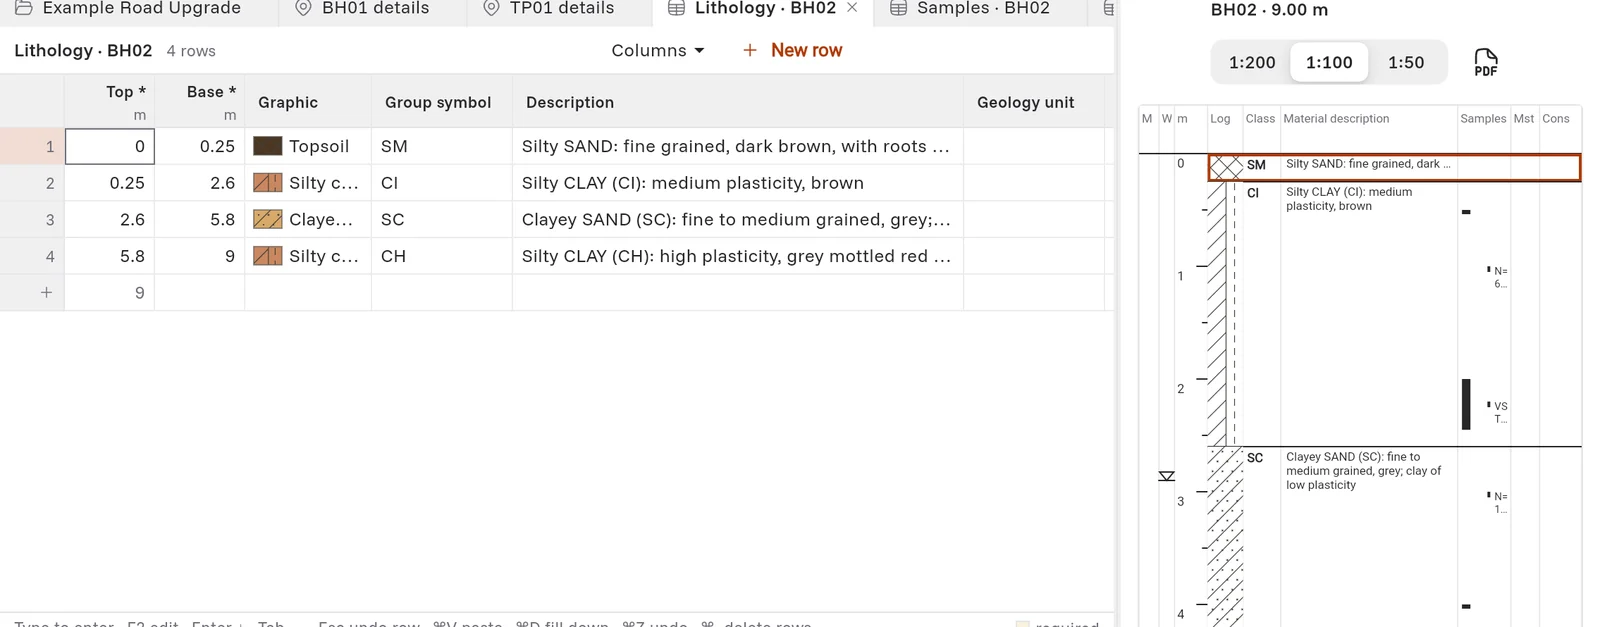
The tables are in these groups under each hole:
| Group | Tables |
|---|---|
| Geology | Lithology, Moisture, Consistency/Density, Defects, Core runs, Strength, Weathering, Defect spacing |
| Samples & tests | Samples, In-situ tests |
| Hole construction | Boring methods, Penetration resistance, Water return, Installations |
| Monitoring | Groundwater, Progress & water levels |
| Comments | Comments |
The project type can hide tables that a kind of work does not use. A hidden table shows again when the hole has rows in it.
Type in a table
- To start to type in a cell, select it and type. You do not have to press F2 first.
- To change a value and keep the text that is there, press F2 or double-click the cell.
- Press Enter to go down. Press Tab to go right.
- Press Delete to clear the selected cells.
- Press Esc to undo the changes to the row that you are in.
The line below each table shows these keys.
Add a row
The last row of each table is empty. Type in it to add a row. In a depth table, the Top of the new row starts at the Base of the row above.
You can also click New row at the top of the table, or press Ctrl+N (⌘+N on a Mac).
Saving
A row saves when you go to a different row. The number column at the left shows the state of each row:
| Mark | What it means |
|---|---|
| ✎ | You are editing the row. It is not saved yet. |
| Orange dot | The row is saved on this device. It goes to the server at the next sync. |
| ! | The app held back the row because a value is wrong. Select the cell to read why, in the line below the table. Fix the value. |
| Lock | The office locked the row. You cannot change it. |
Colours in the cells
Some cells have a pale colour. The key is at the bottom right of the table.
- required: you must fill in this cell.
- calculated: the app works out this value from other values.
- hole override: this hole uses its own value, not the value of the project.
Copy, paste and fill down
| To do this | Do this |
|---|---|
| Copy the selected cells for Excel | Ctrl+C. To copy the column names too, use Ctrl+Shift+C. |
| Paste cells from Excel | Select a cell, then Ctrl+V. |
| Copy the top cell into the cells below | Select the cells, then Ctrl+D, or Home › Fill down. |
| Delete the selected rows | Ctrl+-, or Home › Delete rows. Click Delete to confirm. |
| Undo or redo | Ctrl+Z or Ctrl+Y, or Home › Undo and Home › Redo. |
On a Mac, use ⌘ for Ctrl.
Paste a log from Excel
- In Excel, copy the rows and the row of column names above them. The names can be the names in the app (Top, Base, Description) or the AGS names (GEOL_TOP, GEOL_BASE). The order of the columns is not important.
- In the app, select a cell in the table. Press Ctrl+V.
- Read the preview. It shows which column goes into which field. The app does not use columns that it cannot match.
- Press Enter. The app adds the rows. To stop, press Esc.
Note: A paste with column names always adds rows. A paste with no column names writes over the cells from the selected cell, right and down, as in Excel.
Type only the tops
In a depth table, you can type the Top of each row and leave the Base empty. Then click Home › Fill bases, or press Ctrl+Alt+B. Each row gets the top of the next row as its base. The last row gets the final depth of the hole.
Text tools
- Upper case: select cells, or put the cursor in a word, then click Home › Upper case. The text changes to capitals, for example for a soil name.
- Text macros: type a short key, then press F3. The app writes the text for the key, for example sc F3 gives Silty CLAY. To change the keys, click Home › Text macros. The macros are for you only, on this device.
Choose which columns show
- Click Columns at the top of the table. Select a set of columns, for example Field or Description parts in the lithology.
- To hide one column, right-click its name and click Hide column. To show all the columns again, click Show all columns, default widths.
- To move a column, drag its name onto the column that it must go before.
- To change the width of a column, drag the right edge of its name.