
Record DCP tests beside a hole
Type up a dynamic cone penetrometer (DCP) test beside a hole in GeotechOS Borehole Logging, see the CBR values and print the DCP report.
Applies toWindows and macOSWeb browser
A dynamic cone penetrometer (DCP) test is often done beside a borehole or a test pit, for example from the base of the hole. Type up the blows from the field sheet. The server works out the CBR values and the DCP report. The results print in the penetration resistance column of the log sheet.
Add a DCP test
- Open the hole.
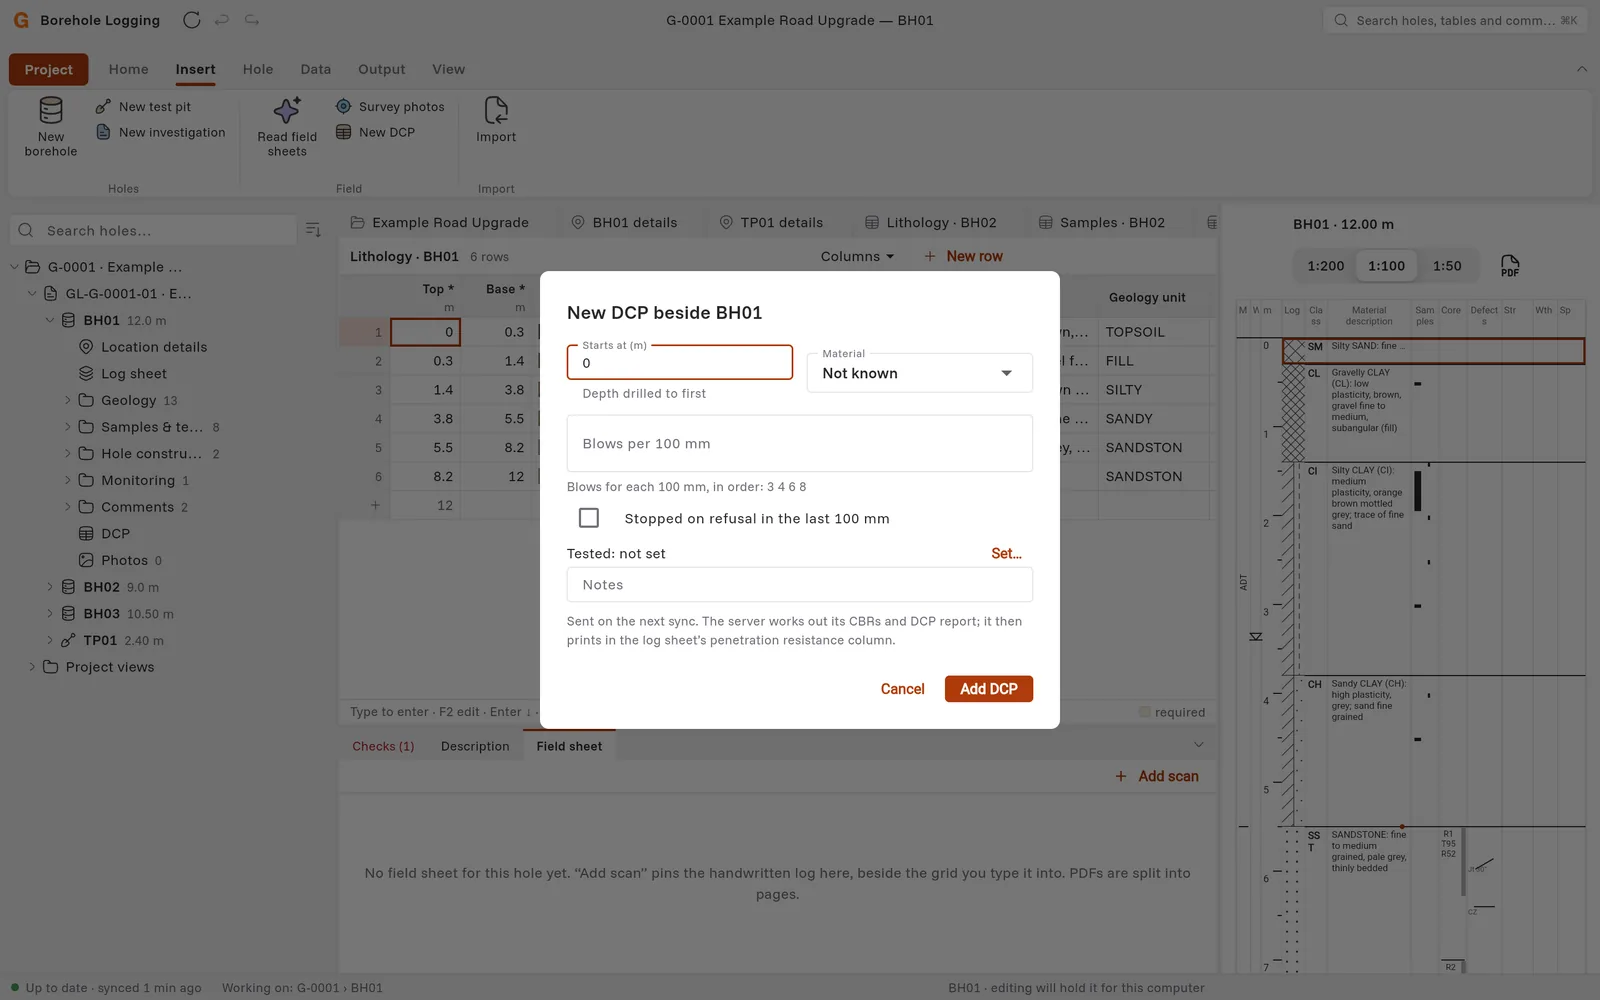
- Click Insert › New DCP. You can also click New DCP… on the DCP page of the hole.
- In Starts at (m), type the depth that the test starts at. For a test from the surface, type 0. For a test from the base of a hole, type the depth drilled to.
- In Material, select the material, for example Silty clay or Fine crushed rock. Select Not known if you do not know it.
- In Blows per 100 mm, type the blows for each 100 mm, in order, for example 3 4 6 8 12. You can put spaces, commas or one value on each line between the values.
- If the test stopped on refusal in the last 100 mm, tick Stopped on refusal in the last 100 mm.
- Next to Tested, click Set… and select the date.
- Optional: type Notes.
- Click Add DCP.
Borehole Logging sends the test at the next sync. The server then works out the CBR values.
See the results
In the project tree, click DCP under the hole. For each test, the page shows:
- A table with one row for each 100 mm: From (m), To (m), Blows, Blows / 100 mm, mm / blow, CBR (%) and Note.
- The Average CBR and the Design CBR.
DCP tests recorded on site in the GeotechOS Field app also show here.
Print the DCP report
On the DCP page, click Report (PDF) next to the test. The report is ready after the test is sent and the server works it out. Your computer must be online.
Delete a DCP test that is not sent
A test that is not sent yet shows Remove on the DCP page. Click Remove, then click Remove again to confirm. After the test is sent, ask the office to delete it.